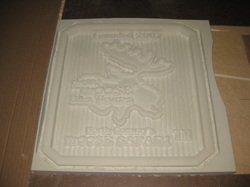
I had some time tonight so I was able to tool path this plaque and get it cut.
I was also able to get it primed and ready for paint.
 Made good progress with this one. I had some time tonight so I was able to tool path this plaque and get it cut. I was also able to get it primed and ready for paint.
0 Comments
At The Last Chamber After hours event I donated a Voucher for a one square foot personalized sign plaque. The Idea is that the recipient would contact me and we would design something that was appropriate and I would make it.  Well It didn't take long for the recipient (Mount Washington Valley's Moose Tours) to respond. By the Time we returned home that evening The winner liked my face book page and within a few days he called and set up an appointment to meet. 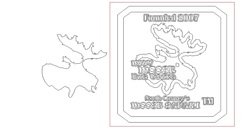 This fellow was pretty sure of what he wanted so I was able to download the majority of the artwork from his web site. I added the boarder, the "Founded 2007" and some outlines for the text. 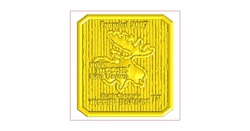 Then It was up to me to build up the reliefs using Enroute. We had the base relief, the boarder, the text outline, the moose outline, the Body of the moose and the text that were all separate reliefs. Once I had These positioned vertically I merged them together and deleted the original artwork. Now It needs to be toolpathed and sent to the Multicam Router for cutting. Yesterday was a Big Day for the Display booth, It left the nest for it's first flight into the real world. The first landing point was to perch the largest part of the display (The Excavator Sign Component) on a borrowed sign. This General Contractor ( L. A. Drew Inc.) graciously allowed me to set up the Excavator on their existing sign for a photo shoot. 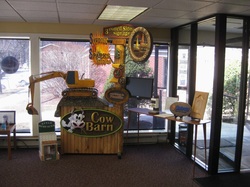 Then It was off to set up for the Mount Washington Valley's Chamber after hours event Hosted by Chalmers Insurance Group. The Event went well with the display warmly recieved, And many connections made. The Next Flight is scheduled for May 15th , the Business to business Expo at the Mount Washington Hotel In Brenton Woods. NH This week has been a little trying, I received my new computer for the shop and spent much of my time Installing programs, swapping over files and configuring things to work with my Multicam Router and the Enroute Software. After some Trial and error I think we are good to go. This New Comp. should speed up the rendering process when I'm working with reliefs and large files. 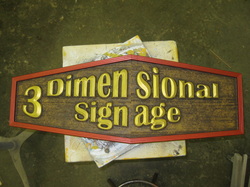 I was able to get a couple of signs routed to add to my booth before I disconnected the old computer. This pic dosn't show this but the middle of this piece is raised and the two ends tapper away, adding some true dimension to the sign. 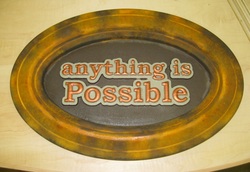 The booth gets it's debut this comming tuesday @ the Mount Washington Valley Chamber of Commerce,"Chamber after Hours" at Chalmers Insurance Group. With This piece I wanted to show that I can take a shape like standard colonial casing and make it any shape you want, This would be virtually impossible with regular casing. Then to go one step further I used Iron paint with a rust activator ( from the Modern Masters Collection) to take that Casing profile and make it turn to rusted metal. How cool is that? 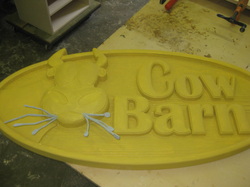 At this point I have applied 1 coat of HDU Primer and sanded that after it had a chance to dry. Then I applied a base coat of paint, This color is mostly for the wood grained texture background, but I'ts just as easy to apply this base coat to the entire piece as it adds another layer of paint to the sign, Plus I don't need to worry about cutting in any edges yet. As you can see this process was making the cow pretty hungry so I thought I'd give him some oats. 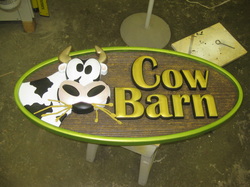 Now we're cooking with Gas! Really starting to take on some life, It's amazing what color can do. The basics are here but It still needs a few more coats, the lettering, the snout (pink), the black spots and the green border. The wood grain, the white and the black lettering outline are complete. The last detail will be sowing The wild Oats stay tunned:
I wanted to add some things to my display to help show other things that can be done and to help define what it is I am promoting. 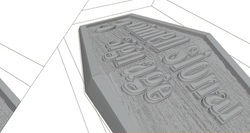 This is a screen shot of a "3 dimensional Signage" Sign in the Design stage of Enroute. You can see here that I have built this in two pieces, a right and a left, tilted each so that they would be raised in the middle when they were merged together. (A Bit Of A Challange but now that I have done one I have the technique down.) 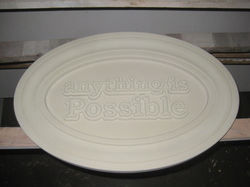 This one is difficult to see but it says, "Anything is possible". I created a vector or Drawing of the profile of a piece of standard colonial Casing, then I extruded that shape around this oval. Try that with store bought casing! I wanted this to show just what can be accomplished in a real world situation. It will show much better when it gets p Because of the thickness of this sign (3") and the material I have to cut it out of I had to extract 2 slices from the design using enroute. Below is a screen shot of the front view of the sign in Enroute. 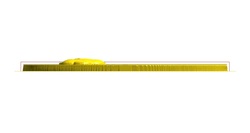 In this shot the red rectangle represents the size of the plate,( material that I'm going to cut this out of), as you can see the face of the cow stands above the plate. I made 2 slices with the first one being 2" thick and the remaining piece can cut out of a piece of 1" material. 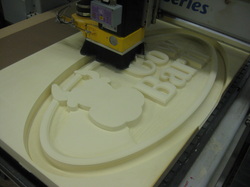 once slices are complete and toolpathed it's off to the Multicam (router). Look Ma No Face! This was a big file with all the textures etc. It took the router 7 hours to cut this piece. ( this is when you hope the power dosen't go out !) 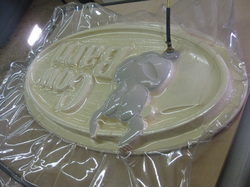 When all parts are cut I'm using my vac clamp, which is a giant bag that you suck all the air out of and the atmospheric pressure applys a tremendous amount of force which clamps everything in place. This is a great system for clamping odd shaped parts that you could not get conventional clamps on, and it creates equal pressure all over the parts. This similar type of system (without the bag) is what is used to hold the parts on the router table when it's cuttting. The other advantage to this type of clamping is thatthe Gorilla Glue expands as it cures and can really make a mess, The bag that holds the parts in place contains the expansion of the glue and makes for easier clean up of the glue line. Once again I ask should I do a video of glue drying? |
AuthorDonald A. Johnson 
This is an on going story of my explorations into the artistic world,chronicling the process of this journey. Highlighting my successes as well as my failures. I'll try not to focus on the failures, but they are what has taught me the most.
I Owe the ability to take this journey to; My Mom (for she bred in me a drive and creativity required for this type of trip) My Incredible Wife and Children for their support, and to the world of creative people that inspire me everyday. One in particular is Dan Sawatzky (click here to meet Dan) This Guy has Changed the way I look at things. He is truly an artist and a Visionary with passion. Archives
June 2014
Categories
All
|