• WELCOME
  • Blog "The Journey"
  • IN THE WOODS
  • LET'S METAL
  • A SIGN OF THE TIMES
  • CARVINGS AND DIMENSIONAL PIECES
  • DIMENSIONAL SIGN AND SIGN COMPONENTS
  • CONTACT
  • STILL BUILDING
Sawdustnsparks.com       603-356-9080

Glazy crazy

9/24/2012

0 Comments

 
Picture
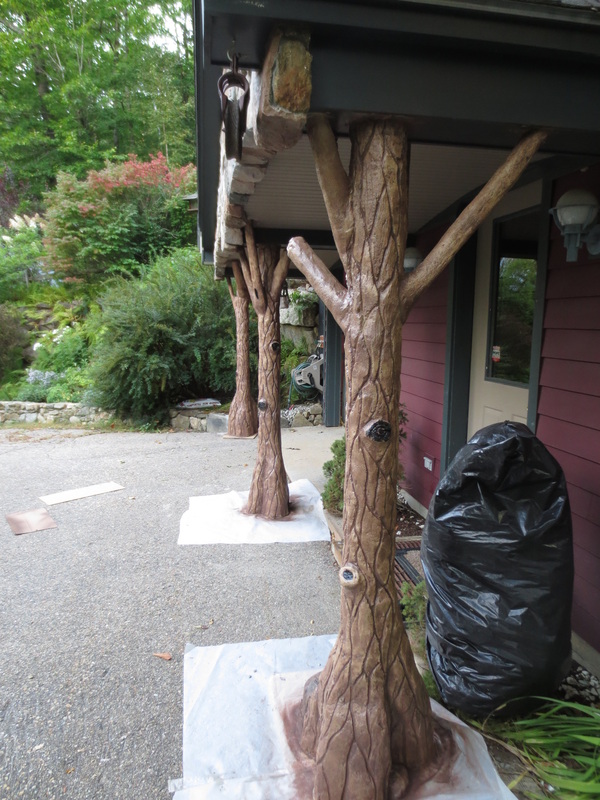
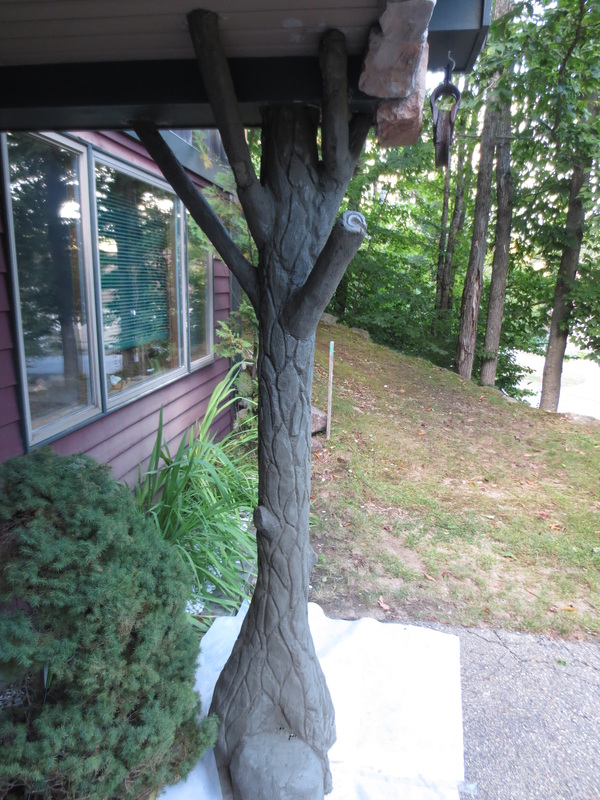
With the base coat done and given a chance to set up it's time to start with the glaze coats. I started with this first color that I mixed up and called
"Fudgecicle" but once it dried I had to rename it to "chocolate covered cherry", (mostly a chocolate brown with some red tones).
Then toned it down with a grayish green also a custom mix I dubbed "Crete".
The glazes are Paint Mixed with a clear exterior paint base. I sprayed this on and then wiped and rubbed off the high areas with a rag leaving the color in the deeper cracks and crevases.


Picture
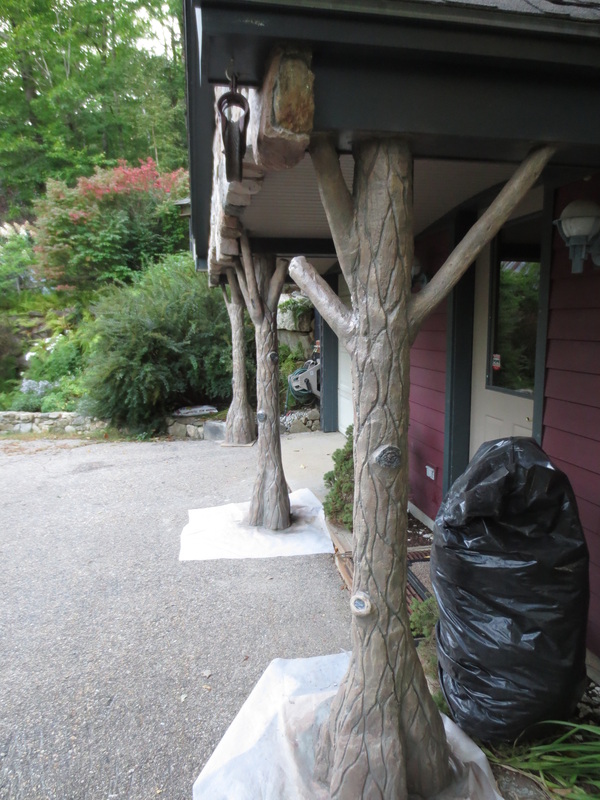
As I am still learning the finer details of this process I feel like I should have reversed the last two colors and done the "crete"1st and the chocolate coveres Cherry last.
I end up applying a third coat of glaze that was another custom dark chocolate brown to bring back some of the depth and contrast.


Picture
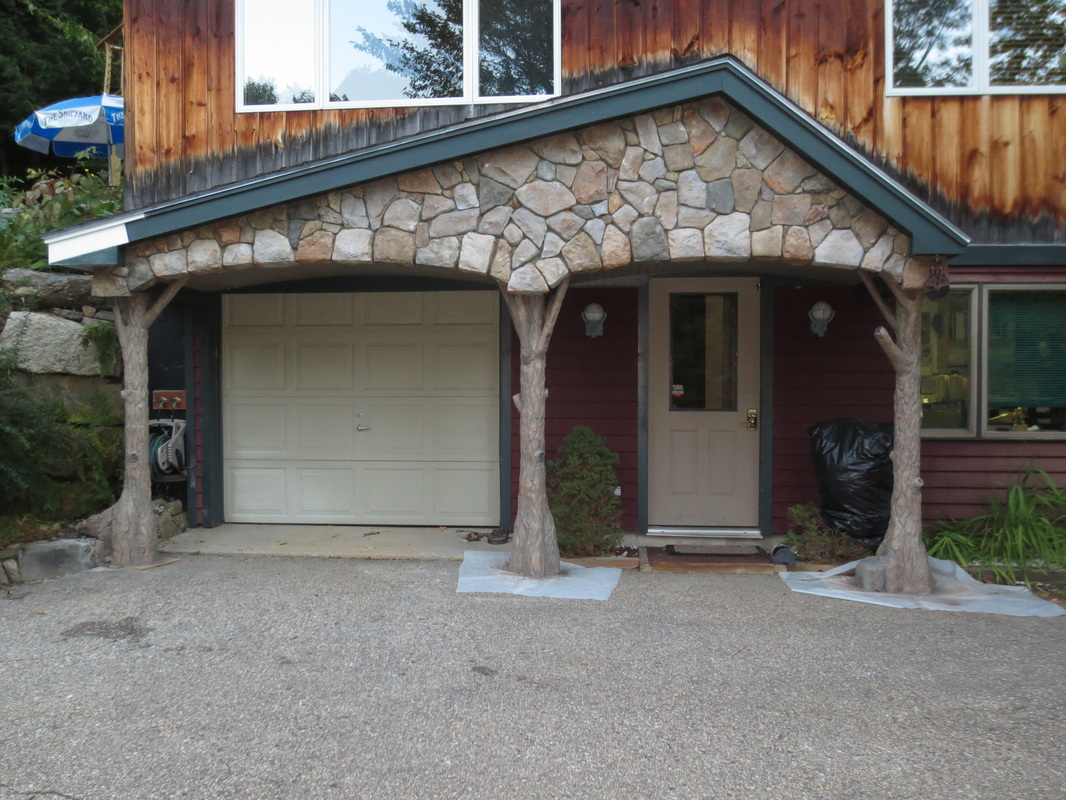
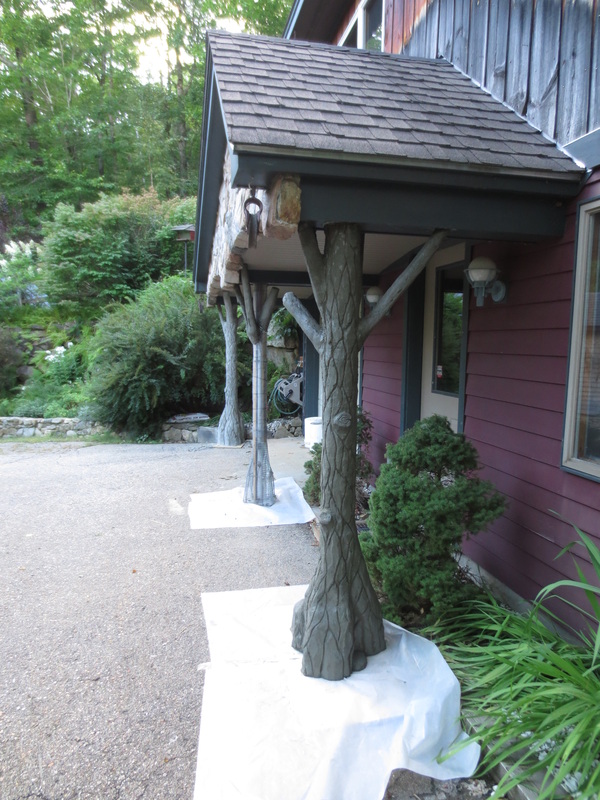
 For this project I'm happy with the results.
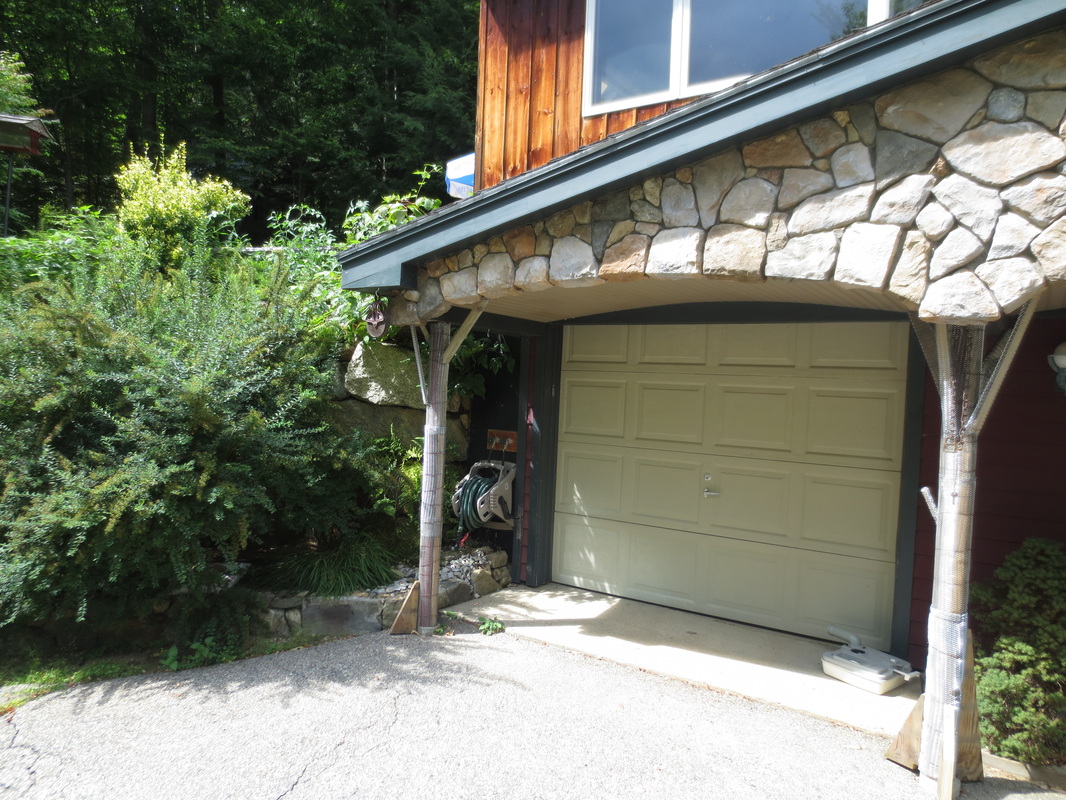
The trees look fairly realistic.
The fun part of this is you can make these as antimated as you like given the particular application.
Now it's time to repaint all the surrounding trim , doors and clapboards.
One thing I know for certian is these will never rot.

0 Comments

Carved in Crete

9/11/2012

0 Comments

 
Picture
I started this project last spring and am just now getting back to it.
I added some branches to the tops of the trees and attempted to flair the bases with pressure treated wood to be covered by wire lathe.
But I realy wasn't pleased with the outcome so I pulled out the welder and fabricated a pencil rod skeleton to attach the wire lathe to (this method allowed me to get a little more fluid with the shapes of the bases.)

Picture
Here you can see the flexability you have when using the pencil rod , It's easy to bend to any shape you want with your hands and by welding you can securely attach it anywhere you please.

Picture
Once everything is shaped and covered with the wire lathe it's time to get out the concrete stuff.
On these small trees and the branches it's a teadious process.
This is a rough application process working from the top down.(you cannot work the concrete much at all or it will just fall off of the lathe) the only way to do this is to apply a little at a time and at the most three swipes with a trowel then move on, and on, and on.

Picture
After the concrete is applied you need to be patient and wait for the concrete to set up enough before you start to carve it, or again it will just fall off.
Using a variety of crude tools, a sharpened stick, a customized butter knife, some rolled up wire lathe, a stiff brush and a soft brush to name a few.
you start carving letting your imagination be your guide.

Picture
This a very labor intensive process but the results are outstanding, I don't know of another way to accomplish this type of detail.

These will look really cool once they have been painted and glazed.

Another display to show potential customers.  This type of work needs to be seen, It's difficult to explain it.

stay tunned for the finishing touches.

0 Comments

Spring in Happy Valley

4/12/2012

1 Comment

 
Picture
With the arrival of spring It's time to dust off the list of out door projects that I'd like to tackle this year.
One of the first is to cover the structural supports to the enrty roof leading into the house.
 I originaly supported this structure with some log style posts out of natural wood, well those didn't last long.
So the plan here is to make my own log / tree style posts utilizing the concrete sculpting techniques I learned from Dan Sawatzky www.imaginationcorporation.com

Picture
The first step is to get some strips of PT (pressure treated wood) attached to the lolly columns that I can then attach wire lathe to.
To accomplish this I used three vertical pieces of pt per post and wrapped those to the post with tie wire. Then I could staple the wire lathe to these strips of pt to assist in holding one end of the lathe while I wrapped it around the post.
I'll add branches etc. after the initial wrap of lathe I think this will make wrapping easier and when I screw the branch sections to the pt. it will help secure the lathe.

It's a wrap till next time.

1 Comment

    Author

    Donald A. Johnson

    Picture
    This is an on going story of my explorations into the artistic world,chronicling the process of this journey.    Highlighting my successes as well as my failures. I'll try not to focus on the failures, but they are what has taught me the most.
      I Owe the ability to take this journey to; My Mom
    (for she bred in me a drive and creativity required for this type of trip) My Incredible Wife and Children for their support, and to the world of creative people that inspire me everyday.
     One in particular is Dan Sawatzky (click here to meet Dan) This Guy has Changed the way I look at things. He is truly an artist and a Visionary with passion.

    Archives

    June 2014
    April 2014
    March 2014
    January 2014
    October 2013
    June 2013
    January 2013
    December 2012
    November 2012
    October 2012
    September 2012
    August 2012
    July 2012
    June 2012
    May 2012
    April 2012
    March 2012
    February 2012
    January 2012

    Categories

    All
    Around The House
    A To Z
    Barge
    Benji
    Brewing Up A Storm
    Chamber Plaques
    Cow Barn
    Detzer
    Dragon's Lair
    Elfs Lodge
    Elf U
    Excavator
    Glen Junction
    It Does'nt Always Go Well.
    Moat Mountain
    Sawdustnsparks Sign
    Shop Helpers
    The Vault
    Towers Steeplejacks
    Trade Show Booth
    Tree Amigos
    Up In Arms

    RSS Feed

Powered by Create your own unique website with customizable templates.